
Learning how to record family interviews is an exciting idea, but the technical side can feel daunting. You want to capture their stories, but worry about bad audio or messing up the recording. Forget the professional studio and expensive gear. You can capture a priceless, high-quality interview today with the smartphone you already have.
This guide covers:
- A 5-minute checklist for a perfect recording setup.
- How to choose between audio and video (without the stress).
- Simple fixes for the most common audio problems.
- What to do right after you hit stop to keep the momentum.
Why a Simple Setup is All You Need
The biggest myth about recording a family story is that you need fancy equipment. You do not. Modern smartphones have incredible microphones built right in. A quiet room and smart phone placement will outperform an expensive microphone in a noisy, echoey space every time.
What You Will Need
- A smartphone (iPhone or Android)
- A quiet room
- Optional: headphones for checking your test recording
Your 5-Minute Recording Checklist
Follow these five steps for the best audio setup for interviews at home. This checklist is the easiest way to get started and learn how to get clear audio recording from day one.
Step 1: Choose a Quiet Room
Look for a space with soft surfaces that absorb sound. Avoid kitchens and bathrooms where hard surfaces create echo.
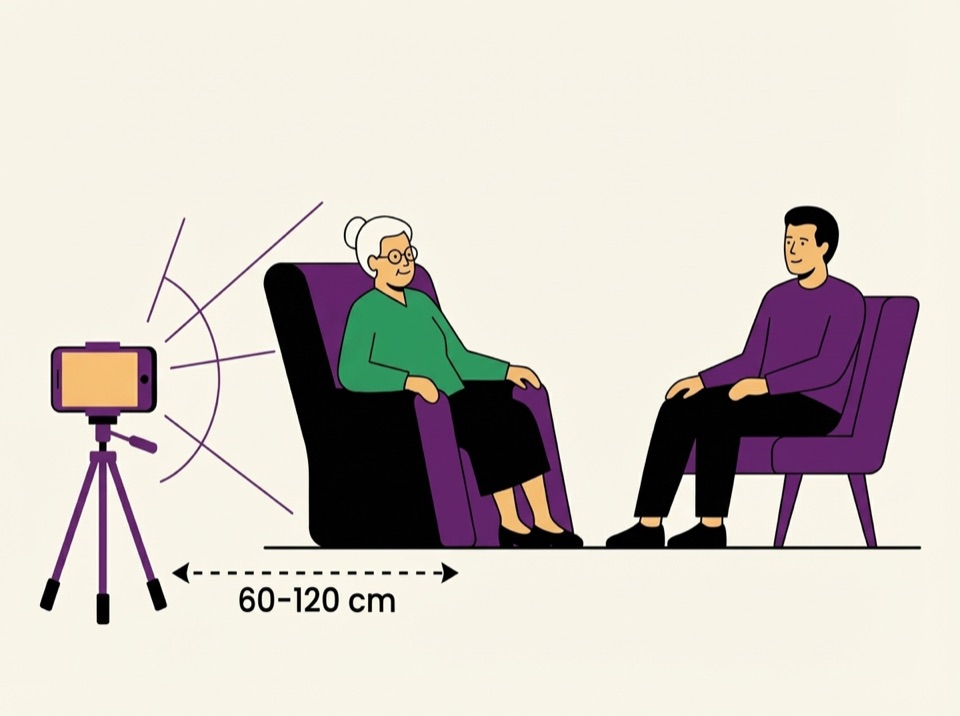
Step 2: Position Your Phone Correctly
Place your phone on a stable surface about 2 to 4 feet away from the person speaking, at roughly mouth height. Aim the primary microphone toward them.
Step 3: Eliminate Background Noise
Turn off the TV, radio, and fans. Shut windows to block traffic noise. Put phones on Do Not Disturb mode.
Step 4: Record a 10-Second Test
Record a short test and listen with headphones. Adjust distance or room setup if needed.
Step 5: Keep the Mic Pointed at the Speaker
Once you start, avoid moving the phone around.
Audio vs. Video: What to Choose?
The Case for Audio-Only
Audio is easier, more intimate, and more reliable. For your first few interviews, audio is the best choice.
When to Use Video
Video captures emotion and artifacts like photos or letters, but it requires more setup and lighting.
Our Recommendation: Start with Audio
Get comfortable with audio first. Once you have a rhythm, you can introduce video and even run a separate audio recorder as backup.
How to Fix Common Recording Problems
What if the audio is echoey?
Add soft materials to the room. Move to a space with a rug or curtains. Moving the phone closer can also help.
What if they speak softly?
Move the phone closer. A small adjustment can make a huge difference without disrupting the conversation.
Do I need a special microphone for my phone?
No. Your phone's built-in mic is more than enough when you follow the setup checklist.
What to Do After You Stop Recording
- Rename the file immediately with a clear format.
- Jot down 3 highlight moments while it is fresh.
- Note key names and places mentioned.
- Schedule the next conversation.